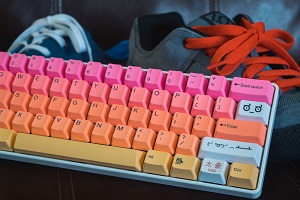
Alright, so you’re digging those cute pink keycaps for your keyboard, but you’ve got a crafty itch and want to make them yourself? Awesome! Here’s the secrets to craft your very own adorable pink keycaps.
Stuff You’ll Need
Before you get your DIY on, make sure you’ve got this stuff ready:
Blank Keycaps
Grab some blank keycaps that fit your keyboard. You can find them online or at tech shops.
Pink Resin
Look for good-quality crafting resin that dries clear. You’ll need enough to coat your keycaps.
Pink Pigment
Get yourself some pink resin pigment. The more you add, the pinker it gets!
Silicone Mold
Find a silicone mold that matches your keycap size and shape.
Mixing Gear
Grab disposable mixing cups and sticks for your resin mix.
Mold Release
You’ll need resin mold release spray to make sure your keycaps come out smooth.
Safety Gear
Don’t forget safety goggles, gloves, and a well-ventilated space to work in.
How to Make Your Cute Pink Keycaps
In this part, we will introduce how to make cute pink keycaps using the following steps:
Set Up Shop
Clear a clean spot to work in and lay down some plastic sheets or a drop cloth to catch any resin mess.
Mix That Resin
Follow the instructions on your resin package to mix it up. Usually, it’s a resin and hardener combo that you’ve got to stir really well.
Pink It Up
Add the pink pigment to your resin mix and stir until it’s your kind of pink. Remember, it looks darker when wet but dries lighter.
Prep the mold
Spray your silicone mold with the mold release spray so your keycaps won’t get stuck.
Pour it in
Pour that pink resin mix into your silicone mold, filling up the cavities. Give the mold a little tap to pop any air bubbles.
Stick in the keycap
While the resin is still wet, put your blank keycap stem-deep into each mold cavity. Make sure it’s centered.
Let it dry
Follow the curing time on your resin’s package. Usually, it’s 24-48 hours. Pop the mold in a clean, dry spot during this time.
Pop them Out
When your keycaps are good to go, flex that silicone mold to pop them out. They should come out without a hitch.
Smooth them down
Use some fine-grit sandpaper or a rotary tool to smooth any rough edges and make them fit snugly on your keyboard.
Get them on your keyboard
Carefully plonk your DIY pink keycaps onto your keyboard. Press them down so they’re snug on the switches.

Conclusion
Boom! You’ve just whipped up your very own set of sweet pink keycaps. Not only did you add a personal touch to your keyboard, but you also unleashed your creative side. Now, enjoy typing on your custom keyboard and basking in the glory of your craftiness!